If you are just starting with unit testing, it can be confusing to know how to structure your unit test method.
Luckily, there is a simple structure you can use to organize your unit tests. The structure that is widely adopted in software development. And that’s the Arrange-Act-Assert structure (also known as the AAA pattern).
In unit testing, the Arrange-act-assert (AAA) pattern is a three-step process to write organized tests. The “arrange” step sets up the conditions needed for the “act” step to run, while the “assert” step verifies that the expected results were achieved.
This pattern provides a clear and concise way to write unit tests and can be used for both functional and non-functional testing. Read on to find out how to write well-organized tests.
What is arrange, act, and assert (AAA) in unit testing?
Unit testing is a type of software testing that involves breaking down your testing efforts into smaller, more manageable pieces called unit tests. Each of these unit tests represents an individual action or scenario that you want to check against a piece of code.
Overall, the goal of unit testing is to help ensure the quality and stability of your code by reducing bugs and identifying potential issues before they become problems. So if you are looking to develop robust unit tests for your codebase, but don’t know where to start, I have a perfect guide for you that you should definitely read.
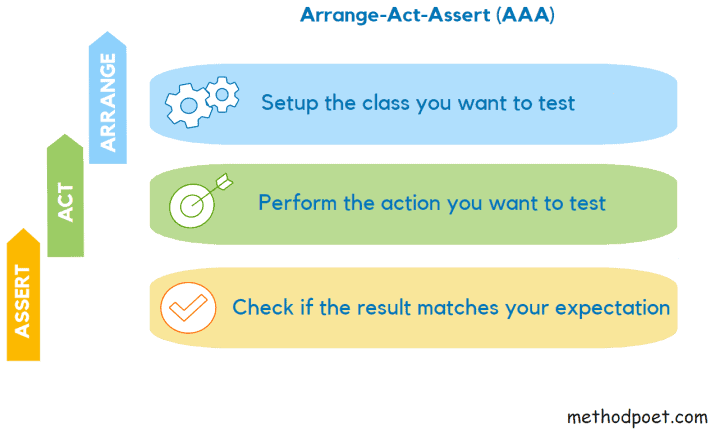
Arrange, act, and assert, or AAA is a method commonly used in unit testing to organize and visualize the steps of a test case. In this approach, each test method is sequentially separated into three sections:
- Arrange: Prepare the class you want to test.
- Act: Perform the action you are testing.
- Assert: Check the result of the action you are testing.
The Arrange-Act-Assert pattern aims to organize the code used in test methods and make it easy to see clearly what the test is trying to accomplish. In AAA, each test method can have distinct sections to organize different aspects of the test.
Let’s see one example of how to structure the test method to follow this pattern. The following test covers the biggest math problem everyone wants to test in their blog posts; adding two numbers.
[Fact]
public void AddTwoNumbers_returns_sum_of_numbers()
{
    //Arrange
    var calculator = new Calculator();
    //Act
    var result = calculator.AddTwoNumbers(5, 6);
    //Assert
    Assert.Equal(11, result);
}
- In the Arrange part of the unit test, you construct the system under test, the class you want to rest. In this case, that’s the
Calculatorclass. - In the Act part of the test case, you call the method we want to check,
AddTwoNumbers. - In the Assert part of the test, you check that the test result is as expected. You use the
Assert.Equalmethod to check that the result is equal to 11. That method is a part of a xUnit framework, which provides you with the methods to make writing unit tests easier and faster.
Arrange, or Preparation

The Arrange section of the unit test is the setup.
It’s where you lay the groundwork for what you’re testing and set up all the variables you’ll need. You need to make sure that all necessary components are in place to run your tests. This is where you create the system under test, and set up a mocked or stubbed version of the service you need to use, most likely using a mocking framework. Here you want to isolate your code from external dependencies.
For example, this section can be as simple as:
var calculator = new Calculator();
Or it can involve a little bit more setup steps:
_mockNavigationService = new Mock<INavigationService>();
_mockWalletController = new Mock<IWalletController>();
_mockWalletController.Setup(x => x.GetTransactions(It.IsAny<bool>()))
					 .Returns(Task.FromResult(_transactions));

TransactionsViewModel viewModel = new TransactionsViewModel(_mockNavigationService.Object, _mockWalletController.Object);
Typically, your arrange step will look similar to the above. While there are many opinions on the correct length of the arrange section of a unit test, it can typically fall somewhere in the range of 5 to 10 lines of code.
One reason for this is that if the arrange section is longer than that, it may indicate that your test is trying to test two separate things simultaneously, requiring you to split it into two separate tests. The other issue you might have is that your system under test is complicated to set up and use.
One way to simplify complicated test setup is to use Autofixture. Autofixture is an open-source library that can automatically generate dummy test data. For more information about this library, check out this post.
Act, or Execution
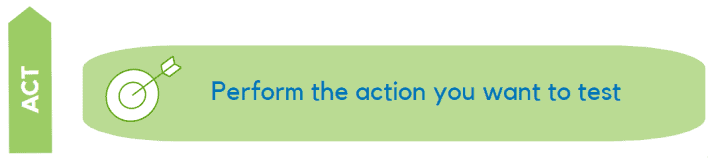
The Act part involves executing the code you want to test. You can usually do this with one line of code.
var result = calculator.AddTwoNumbers(5, 6);
The difference between Arrange and Act is in length and purpose. Arrange usually has several lines, while Act should only have one line. The purpose of Arrange is to create objects. The purpose of the Act is to call methods on those objects.
Assert, or Verification
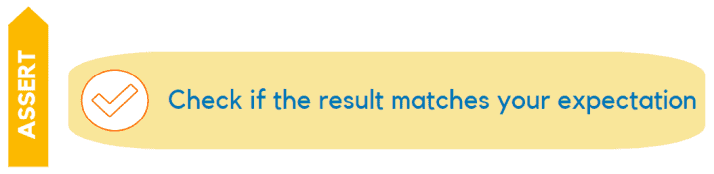
The Assert part of the test code is the section where you actually verify that your code behaves the way you intend it to. How many assertions can the assert section hold? It usually includes one assertion for each of the features or scenarios covered in the Act section.
For example:
Assert.Equal(11, result);
A typical unit test has only one assert. You want to check one scenario, one fact about your code per test.
Can a unit test have multiple asserts?
Yes, it can. It’s ok to use multiple assertions as long the asserts check the various properties of the same object:
Assert.Equal("9780321146533", bookDocument.ISBN);
Assert.Equal('3', bookDocument.ISBNCheckDigit);
Assert.Equal("Kent Beck", bookDocument.Author);
Assert.Equal("Test Driven Development: By Example", bookDocument.Name);
In the example above, you use multiple Asserts to verify that the book document has correct properties.
In case you want to have more readable asserts, you can use FluentAssertions. It can turn the above asserts into the following structure:
book.ISBN.Should().Be("9780321146533");
book.ISBNCheckDigit.Should().Be('3');
book.Author.Should().Be("Kent Beck");
book.Name.Should().Be("Test Driven Development: By Example");
As you can see, this is more readable. For more benefits of FluentAssertions, follow this article.
How large should each section be?
The size of each section, Arrange, Act and Assert, is something to be considered and planned for. You want to make sure there is enough information in every test case but not too much to overwhelm the reader. These things are important because it takes the effort away from the reader, and leave them with a clear understanding of the code.
The good practice when it comes to writing unit tests is as follows:
- The Arrange section should be large enough to create a class you want to test and set up the test data. Ideally, a couple of lines.
- The Act section should be one line. Call the method or unit you want to test, and that’s it.
- The Assert section should ideally contain only one assert method to verify that the Act section has performed as expected.
What are the benefits of AAA?
There are many benefits of AAA in unit testing, but the main one is that it saves time.
It saves time because it helps developers write a test without thinking about how to structure the unit test method. With AAA, developers just follow the instructions that are provided to them.
In addition, you can use AAA for a variety of types of testing, including integration testing, system testing, and acceptance testing.
What are the drawbacks of AAA?
The drawback of this pattern is that it can lock you in thinking that every automated test must look the same.
If you always follow the same pattern, it can be difficult to solve new kinds of problems. For example, if you find that the sections of your code repeat throughout your test class, you may want to use Extract Method refactoring to place Arrange and Act phases into a separate method. In that case, your test might call that method and only have the Assert phase.
And that’s ok.
xUnit AAA test snippet
To help you use this pattern, I have created a small code snippet you can import and use in Visual Studio.
You can also download the snippet using this link.
Just place the snippet in the snippets folder:
%USERPROFILE%\Documents\Visual Studio 2019\Code Snippets\Visual C#\My Code Snippetsand restart the Visual Studio. You can type testaaa to generate the following code structure automatically:

Conclusion
The Arrange-act-assert (AAA) pattern is a three-step process to write organized tests. This pattern can be used in unit testing, integration testing, and system testing.
In this article, we looked at how to use the AAA pattern in C# with practical examples. you have also explored some of the benefits of using the AAA pattern for writing better tests. This is the most common pattern for writing tests since it helps you write your code in small and organized chunks.
With a sound understanding of unit testing, you can be sure that your code is robust and error-free, giving you peace of mind when shipping new features or updates. I highly recommend reading the comprehensive article about unit testing in C# if you want to learn more about this important topic.