Object-relational mapping (ORM) revolutionized object-oriented programming by streamlining the storage and retrieval of data. However, most ORM solutions presume that data is mostly static and read-only, significantly reducing the performance of any application that primarily uses dynamic, always-changing information. Fortunately, Dapper fixes these issues in an easy-to-use package.
Dapper is a popular open-source, micro-ORM solution that is compatible with the .NET application framework. It lets you work with strongly typed data that constantly changes without spending hours writing code. It is especially useful when dealing with unnormalized databases.
However, Dapper has no concept of schema, nor will it translate your queries into SQL. Therefore, by reading further, you will learn how to get started with the ORM and a few of its benefits.
What is Dapper ORM?

ORMs make programming easier despite the intimidation new users often experience. To achieve this goal, they turn Structured Query Language (SQL) into an extension of your preferred programming language. As a result, you access and manipulate your data through a special object library.
Dapper is a simple, open-source ORM for the .NET framework and its associated languages and architectures. It provides a common interface for ADO.NET data readers that does not require you to map query results. It is very popular for its speed and performance comparable to raw ADO.NET code.
However, Dapper is not a full ORM. Instead, it is a micro-ORM with only the subset of the functionality focused on object mapping. Although, you can add features through extensions. As such, Dapper’s feature set can vary between implementations.
What does Dapper do?
In practice, Dapper converts long chains of data reading statements into a hash table accessible through a connection object in the following format:
var products = connection.Query<Product>(SQL);
The Dapper object auto generates enough SQL to retrieve the results, including the commands required to open a connection if needed. This way, Dapper can save you hours of coding, though it can do much more.
Why should I use Dapper?
.NET developers of all skill levels love using Dapper because it:
- Automatically maps query entries
- Automatically flushes the connection with each query
- Processes query faster than most other ORMs
- Does CRUD operations directly through connection objects
- Provides static and dynamic data queries of the database
- Offers generic results for both simple and complex data types
- Can store bulk data in a single operation
It is also easy to install and implement into your applications, with most installations taking less than 30 minutes to complete.
Using Dapper
One of Dapper’s best features is that you can treat it as an extension of the ADO.NET’s native IDbConnection object. You access its functionality as IDbConnection properties and methods. It is this accessibility that gives Dapper its powerful performance.
Because the extension’s methods reside under the “Dapper” namespace, you must add it to your project to use those methods. After that, you can use the following popular Dapper commands to perform CRUD operations.
- Execute: Create INSERT, UPDATE, and DELETE SQL queries, useful for launching stored procedures
- Query: Create SELECT queries including all variations
- QueryMultiple: batch executes multiple queries through a single command
You normally use these commands within a three-step process. At first, you create and open the connection. You then develop your CRUD query before sending it as a parameter of the Execute method.
Other common Dapper methods include QueryFirst, QueryFirstOrDefault, QuerySingle, and QuerySingleOrDefault. These methods offer the same functionality found in LINQ solutions without requiring you to install an additional LINQ framework.
How do you add Dapper ORM to your project?
However, nothing will happen until you install Dapper into your application. It is not a standard feature of any .NET compatible server architecture or the framework itself. As such, you must download It from NuGet or a related package provider such as GitHub.
From there, you have several ways to install the latest version of the framework:
- Through the .NET CLI: Issue the command
dotnet add package Dapperfrom a .NET command line. - The SQL Mapper file: Add the Dapper Mapping file found in the package to your project. It should look like
DapperMappingFileForC#4.5.csorSqlMapperAsync.csdepending on your version of the .NET framework. - Visual Studio NuGet Package Manager: Open the Package Manager Console in Visual Studio and use the command
install-package Dapper
Once installed, Dapper is fully compliant with .NET Standard 2.0. So, you can use it with any .NET application that uses the full .NET framework and Core.
What databases does Dapper support?
An ORM is only as good as its underlying database management system (DBMS), and Dapper is no different. You want something that fits your application while supporting the ORM query commands. Fortunately, Dapper offers fantastic database support thanks to its connection.
Because Dapper is a shell and extension for ADO.NET, it is compatible with any compatible DBMS. NET’s IDbConnection interface. You must provide the right connection string and SQL syntax, but the ORM will do the rest.
That means you can use Dapper ORM with the following databases and many others:
- SQL Server
- SQLite
- Postgres
- Access
- MySQL
- MariaDB
- Oracle
The benefits of using Dapper
While every application is different, there are a few things in common with every project you do. One of them is writing lots of code unless you are working on something small. Your project may even get even more tedious if you must frequently interact with SQL queries. This is because SQL statements can get unwieldy and difficult to troubleshoot and maintain.
Writing SQL by hand is great for performance-optimized tasks and prototyping, you need something less prone to error when developing large enterprise applications. That is the moment when Dapper takes center stage. You must appropriately structure your queries for it to work, but it will make your project significantly more manageable.
Along with better code manageability, Dapper offers many other benefits, most of which are shared by all micro-ORM, including:
- Fewer lines of code
- Faster performance in .NET than comparable full ORM solutions
- Static and dynamic object binding options
- Built-in object mapper
- Multiple queries and bulk data support
- Easy SQL query handling
- Uses the IDBConnection class as its interface
- Streamlined support for stored procedures
- Integrates into non-standard data sources such as Wikipedia and other web services
Disadvantages of Dapper
These benefits should suit most developers and applications, especially those that require the absolute best performance. Dapper is also best suited for development teams with strong SQL skills and resources. That is because Dapper has the distinct disadvantage of requiring SQL query strings for most of its functionality. This can make the micro-ORM less useful and more error-prone in some cases.
A real-world example of using Dapper ORM
Most developers use Dapper to process API CRUD operations because it allows them to modularize their applications. The following example will show you how to produce a .NET 6 API with these CRUD features and configure it through Dapper. While this example exists solely as a demonstration, you can use the same Dapper code and CRUD patterns with any type of data or application.
Pre-requisites
To follow this tutorial, you need to have:
- Microsoft Visual Studio 2022
- SQL Server 2019 Developer
- Microsoft SQL Server Management Studio (SSMS)
- Postman Desktop Agent to use the Postman Web Client
Setting up a database
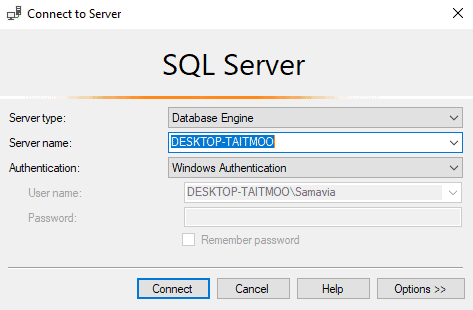
Before creating an API, you must have a database with which you will interact. To do that, open SQL Server Management Studio (SSMS). You will see a dialog box with the server type, server name, and authentication type. Click on Connect.
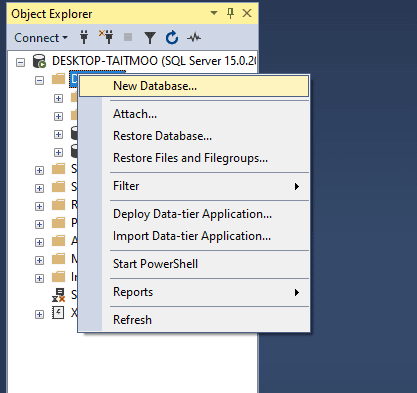
From the Object Explorer window on the left, right-click on ‘Databases’ and Select ‘New Database.’
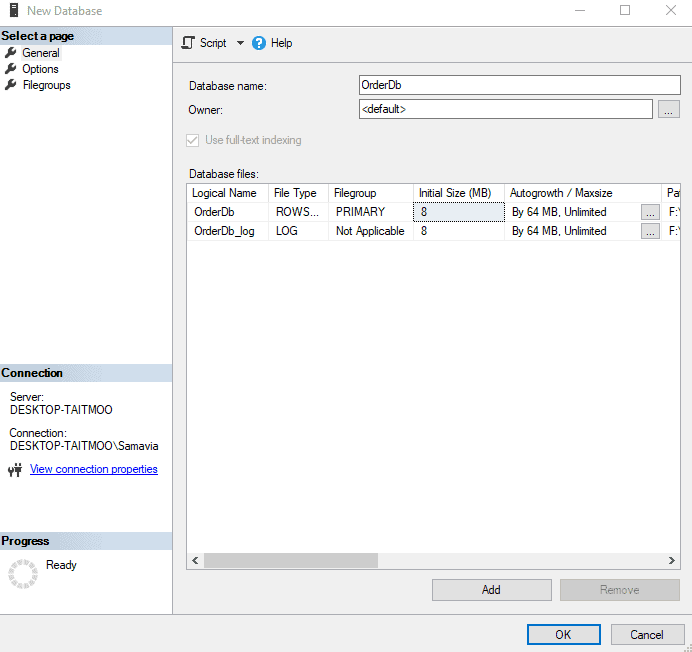
In the New Database window, give a name to your database, for instance, OrderDb, and click ‘Ok.’ Your database has been created.
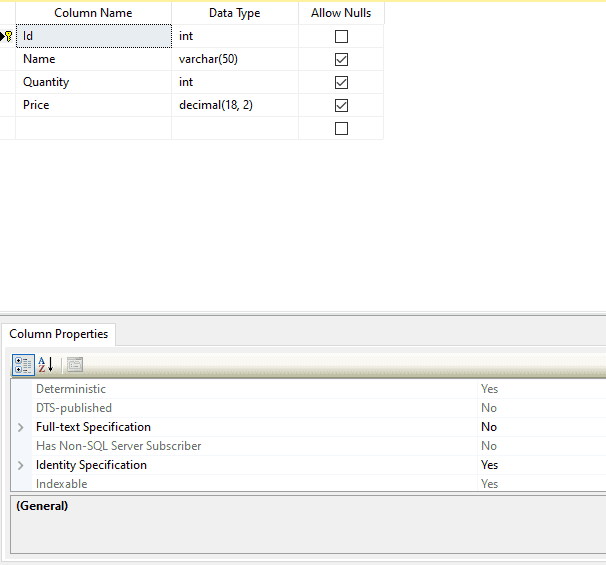
Once you have your database, you need to create a table you will query. To do that, Select ‘New Query’ and copy the following code into your SSMS window. Click on ‘Execute,’ refresh and find the table under the Tables tab in the Object Explorer window.
 CREATE TABLE [dbo].[OrderDb](
	[Id] [int] IDENTITY(1,1) NOT NULL PRIMARY KEY,
	[Name] [varchar](50) NULL,
	[Quantity] [int] NULL,
	[Price] [decimal](18, 2) NULL,
);
The Id column is an Identity column that will automatically increment numbers from 1 every time a new row is added.
Creating a new Web API project
Next, you need to create a new project inside Microsoft Visual Studio 2022.
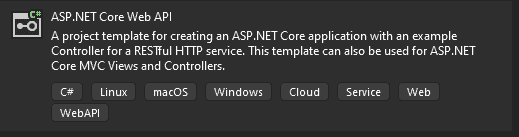
From the taskbar, Select File->New->Project. Select ASP.Net Core Web API that supports C# as shown below:
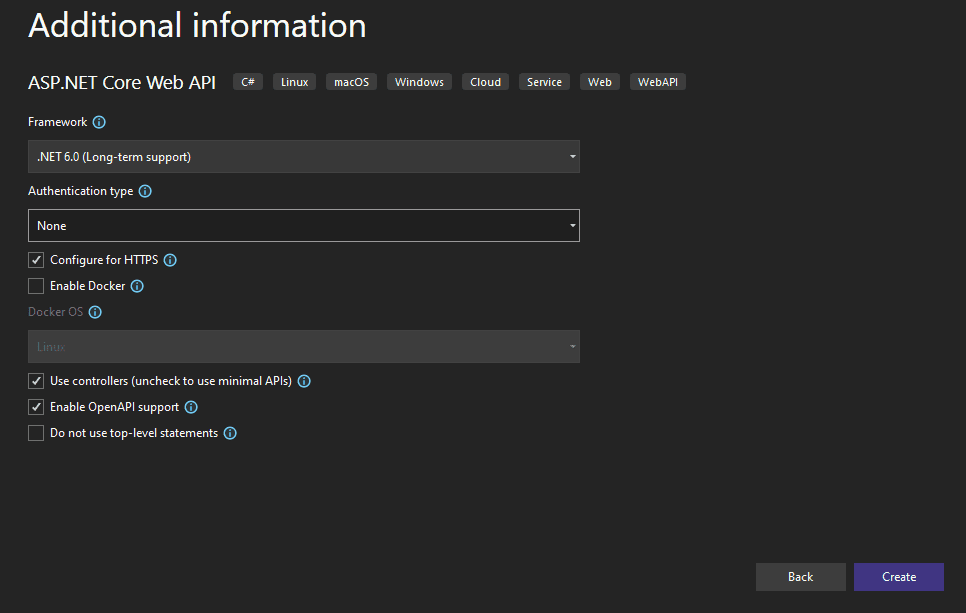
Name your project, for instance, MethodPoetDapperCRUDTesting, and Click on ‘Next.’ Ensure that the Settings are as follows:
- Framework -> .Net 6.0 (Long-term support)
- Authentication Type -> None
- Configure for HTTPS -> Checked
- Use Controllers (uncheck to use minimal APIs) -> Checked
- Enable OpenAPI support -> Checked
Uncheck every other box and click on ‘Create.’ You now have your Web API project.
The project opens up to the following structure:
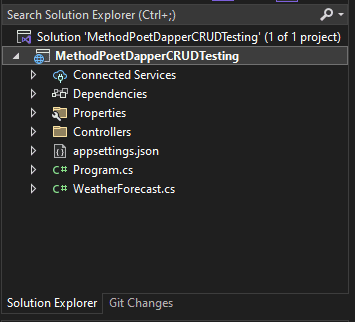
There is WeatherForecast API already present as an example. You can run that for understanding. However, we will make our own API for an extremely basic ordering system.
Setting up Database Connection with appsettings.json
To make your Web API talk to your database, you need to set up a connection with it. You will see some JSON commands already injected in there. Add Connection String below the ‘’AllowedHosts”.
{
  "Logging": {
    "LogLevel": {
      "Default": "Information",
      "Microsoft.AspNetCore": "Warning"
    }
  },

  "AllowedHosts": "*",
  "ConnectionStrings": {
    "SqlConnectionString": "Server= DESKTOP-TAITMOO; Database=OrderDb; Trusted_Connection=true"
  }

}
The name of the Server is different for every individual. It will be present on that “Connect to Server” box that appears at the startup of the SSMS. As for the ‘Database,’ make sure its name matches the SSMS database. Otherwise, a connection will not be possible. Since the connection is safe, make ‘Trusted_Connection=true’.
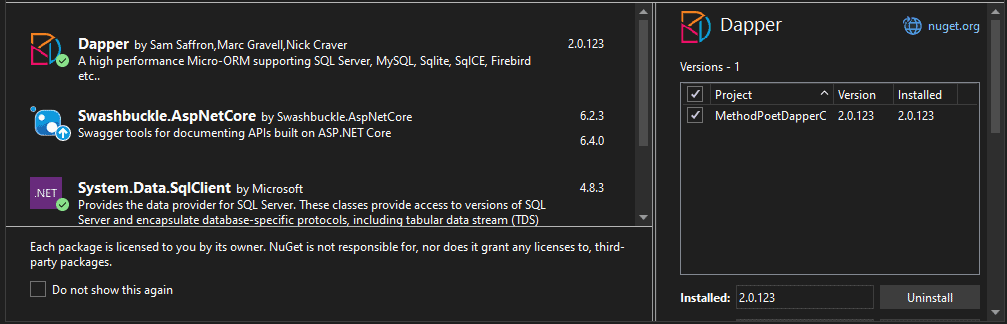
Installing NuGet Packages
To make the web APIs work with Dapper, you need to install a couple of NuGet Packages. To install the packages, go to Tools->NuGet Package Manager->Manage NuGet Packages for Solution.
Select Browse and look for System.Data.SqlClient. Install this package for your solution.
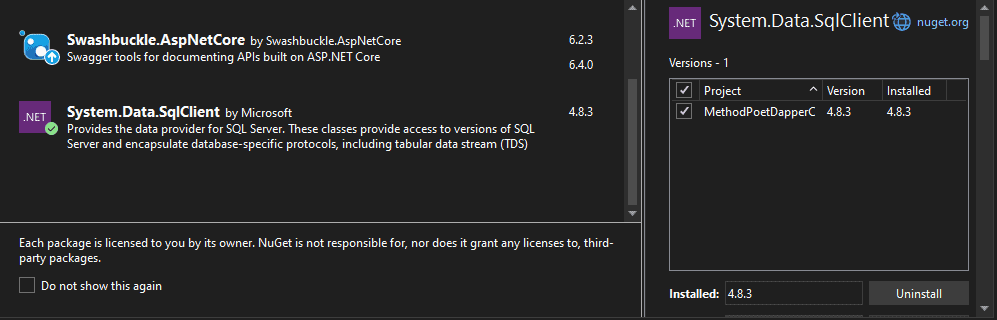
You also need the Dapper Package to make the CRUD methods work with .Net 6. Search for “Dapper” in the Browse search bar and install the package.
Creating a Model Class to define the table structure
The model class will define the database table entries and their types. Since our database has an Id, Name, Quantity, and Price column, the Class will take the same.
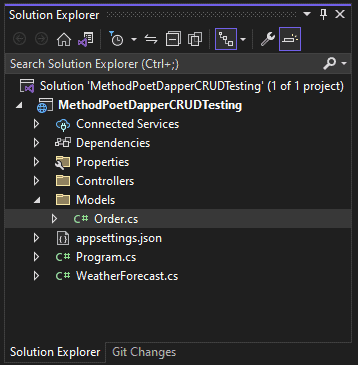
In the Solution Explorer, select the project name i.e. MethodPoetDapperCRUDTesting, then select Add >> New Folder. Name this folder ‘Models’ and Enter.
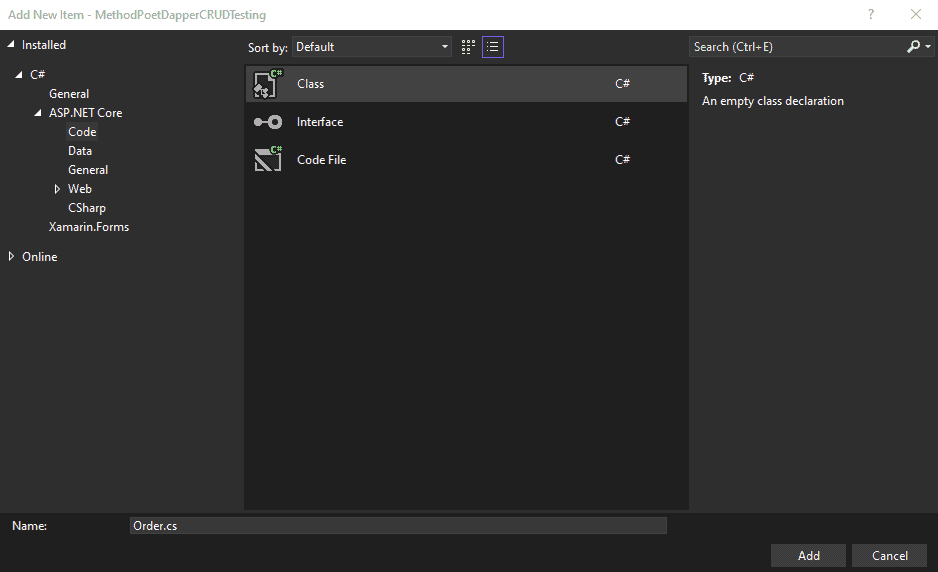
Now add a class by right-clicking on the ‘Models’ and selecting Add>>Class. Name your class “Order”, and then press Add to create it.
The new Class will appear under “Model” as follows:
Copy and paste the script below to the Order Class.
    public class Order
    {
        public int Id { get; set; }
        public string Name { get; set; } = string.Empty;

        public int Quantity { get; set; }
        public decimal Price { get; set; }
    }
Adding the Controller
In the next step, you need a controller to use the Order model you’ve created in the previous step. There will be a ‘WeatherForecastController’ File already present under the Controller section. Ignore it and perform the following steps to create an OrderController:
- Right Click on Controller in the Solution Explorer
- Select Add->Controller
- Choose API and then API Controller-Empty. Add it to move to the next step.
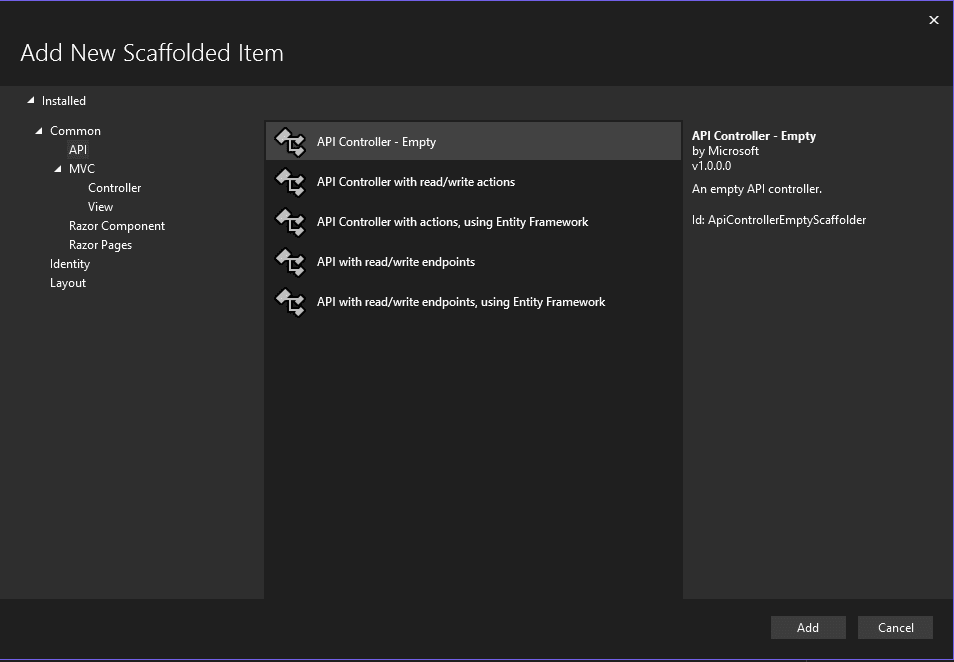
- Name your Controller ‘OrderController’ before selecting Add.
- A new Controller with your desired name will appear along with the example weather forecast controller.
Implementing the CRUD methods with Dapper and SQL Queries
If you don’t need further explanations of the code, copy and paste the following code snippet into the controller:
using Dapper;
using MethodPoetDapperCRUDTesting.Models;
using Microsoft.AspNetCore.Http;
using Microsoft.AspNetCore.Mvc;
using System.Data.SqlClient;


namespace MethodPoetDapperCRUDTesting.Controllers
{
    [Route("api/[controller]")]
    [ApiController]
    public class OrderController : ControllerBase
    {

        private readonly IConfiguration _config;

        public OrderController(IConfiguration config)
        {
            _config = config;
        }

        [HttpGet]
        public async Task<ActionResult<List<Order>>> GetAllOrders()
        {
            //first open a connection
            using var connection = new SqlConnection(_config.GetConnectionString("SqlConnectionString"));
            IEnumerable<Order> orders = await SelectAllOrders(connection);
            return Ok(orders);
        }


        [HttpGet("{orderId}")]
        public async Task<ActionResult<Order>> GetOrder(int orderId)
        {
            using var connection = new SqlConnection(_config.GetConnectionString("SqlConnectionString"));
            var order = await connection.QueryFirstAsync<Order>("select * from OrderDb where id= @Id",
                new { Id = orderId });
            return Ok(order);
        }


        [HttpPost]
        public async Task<ActionResult<List<Order>>> CreateOrder(Order order)
        {
            //first open a connection
            using var connection = new SqlConnection(_config.GetConnectionString("SqlConnectionString"));
            await connection.ExecuteAsync("insert into OrderDb(name, quantity, price) values ( @Name, @Quantity, @Price)", order);
            return Ok(await SelectAllOrders(connection));
        }

        [HttpPut]
        public async Task<ActionResult<List<Order>>> UpdateOrder(Order order)
        {
            //first open a connection
            using var connection = new SqlConnection(_config.GetConnectionString("SqlConnectionString"));
            await connection.ExecuteAsync("update OrderDb set name=@Name, Quantity=@quantity, price=@Price where id =@Id", order);
            return Ok(await SelectAllOrders(connection));
        }

        [HttpDelete("{orderId}")]
        public async Task<ActionResult<List<Order>>> DeleteOrder(int orderId)
        {
            //first open a connection
            using var connection = new SqlConnection(_config.GetConnectionString("SqlConnectionString"));
            await connection.ExecuteAsync("Delete from OrderDb where id=@Id", new { Id = orderId });
            return Ok(await SelectAllOrders(connection));
        }


        private static async Task<IEnumerable<Order>> SelectAllOrders(SqlConnection connection)
        {
            return await connection.QueryAsync<Order>("select * from OrderDb");
        }

    }
}
You can skip these explanations or read them to better understand what you are doing.
Before implementing the actual CRUD methods, you need to create the constructor with the IConfiguration to access the Connection Strings in appsettings.json. The code for doing that is given below:
[Route("api/[controller]")]
    [ApiController]
    public class OrderController : ControllerBase
    {

        private readonly IConfiguration _config;

        public OrderController(IConfiguration config)
        {
            _config = config;
        }
    }
Read operation
The first CRUD operation is READ, also known as the “Get Method.” In this tutorial, we will create two different get methods. One will get all the rows in the database, and the other will return a single row depending upon the entered ID. For creating these methods in Dapper, we need to begin by opening the connection, which is why you will see a connection variable in the code snippet below:
        [HttpGet]
        public async Task<ActionResult<List<Order>>> GetAllOrders()
        {
            //first open a connection
            using var connection = new SqlConnection(_config.GetConnectionString("SqlConnectionString"));
            IEnumerable<Order> orders = await SelectAllOrders(connection);
            return Ok(orders);
        }
Since the Get Method would be required in all upcoming methods, we have refactored that method.
As for the READ operations for a single order, you will add a specific route to read only the order with the Id entered by the user.
        [HttpGet("{orderId}")]
        public async Task<ActionResult<Order>> GetOrder(int orderId)
        {
            using var connection = new      SqlConnection(_config.GetConnectionString("SqlConnectionString"));
            var order = await connection.QueryFirstAsync<Order>("select * from OrderDb where id= @Id",
                new { Id = orderId });
            return Ok(order);
        }
Create operation
The CREATE operation, also known as “Post Method” in ASP.Net Core, is another asynchronous operation we are performing. Here the SQL query will be Insert Into instead of Select * From. The name and values of all the variables are inserted, and all the orders are returned wrapped in an Ok statement.
        [HttpPost]
        public async Task<ActionResult<List<Order>>> CreateOrder(Order order)
        {
            //first open a connection
            using var connection = new SqlConnection(_config.GetConnectionString("SqlConnectionString"));
            await connection.ExecuteAsync("insert into OrderDb(name, quantity, price) values ( @Name, @Quantity, @Price)", order);
            return Ok(await SelectAllOrders(connection));
        }
Update operation
The “Put Method” updates the records with new values. It takes the Id of the database record you want to update and changes only in the specified records. The entire database would be updated with the duplicate entries if the ID were not set.
        [HttpPut]
        public async Task<ActionResult<List<Order>>> UpdateOrder(Order order)
        {
            //first open a connection
            using var connection = new SqlConnection(_config.GetConnectionString("SqlConnectionString"));
            await connection.ExecuteAsync("update OrderDb set name=@Name, Quantity=@quantity, price=@Price where id =@Id", order);
            return Ok(await SelectAllOrders(connection));
        }
Delete operation
To delete the record, you need to add a route with the orderId. The order with the ID specified by the user will get removed from the database.
        [HttpDelete("{orderId}")]
        public async Task<ActionResult<List<Order>>> DeleteOrder(int orderId)
        {
            //first open a connection
            using var connection = new SqlConnection(_config.GetConnectionString("SqlConnectionString"));
            await connection.ExecuteAsync("Delete from OrderDb where id=@Id", new { Id = orderId });
            return Ok(await SelectAllOrders(connection));
        }
Now, it is time to test your web APIs.
Testing Web APIs with Postman
Postman helps you test web API online. However, you need to install their desktop agent, which will let you send a request from your browser to your local database.
After you have downloaded the Postman desktop agent, open the Postman app. A window like this will appear:
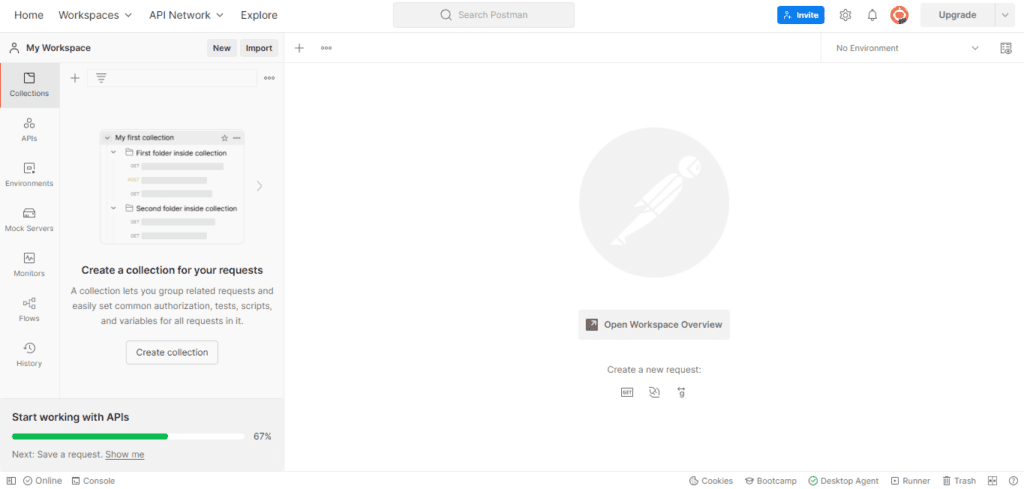
Open a new request from the “+” button in the top left-hand corner.
Since this is a basic tutorial, we will not play around with the in-built examples. You will find some pre-written .json under properties in your Visual Studio Project.
Find the applicationURL under profiles; it will be of the type https://localhost:7182.
Extend it so that it reads https://localhost:7182\api\yourmodelclassname. The Model class, in our case, was ‘Order.’ Replace it with the above URL and paste this URL into the Postman web client.
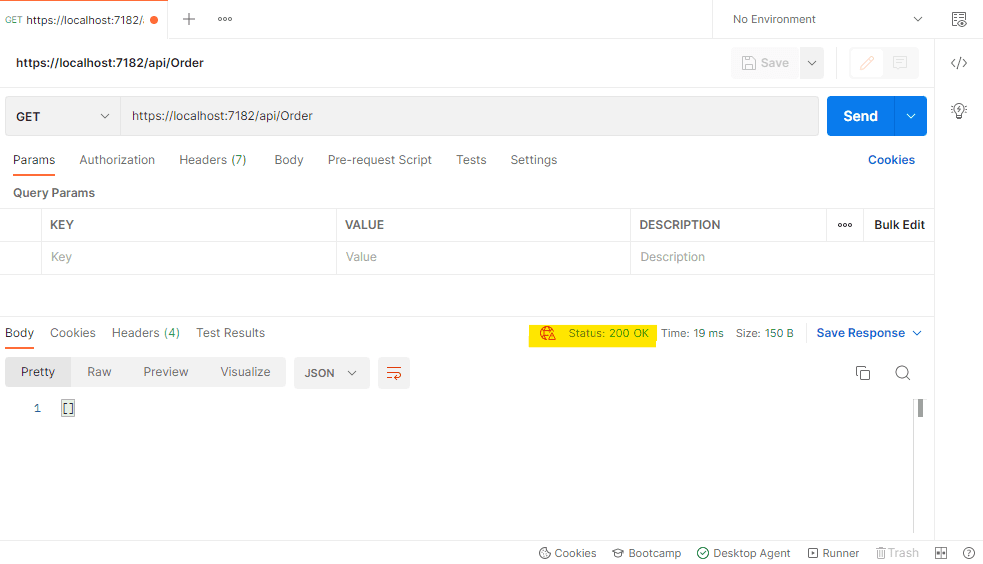
Testing HTTP Get method
To test the Get Method, choose GET from the drop-down menu and hit SEND. A ‘200 OK’ status will represent a successful response. You can visualize the data in JSON, HTML, TEXT, or XML. In our case, we will be returning a JSON, and we should be getting an empty table back.
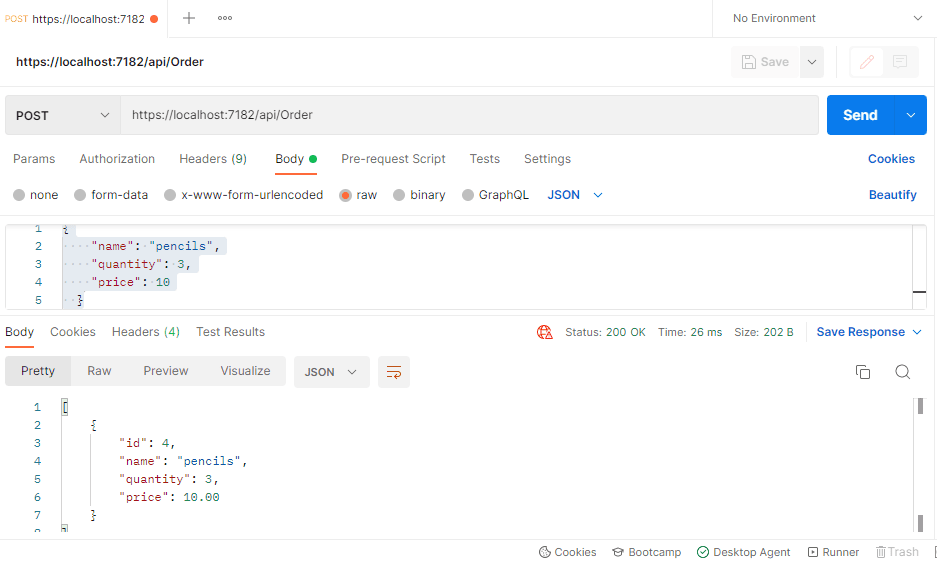
Testing HTTP Post method
To test the post method, choose POST from the drop-down menu, and enter the URL in the designated place.
Choose Body->raw->JSON in the options below the URL box.
Copy and paste the following JSON script in the box:
{
    "name": "pencils",
    "quantity": 3,
    "price": 10
}
Hit Send and find the ‘200 OK’ Response for success. You will see all the orders saved in your database in the response window.
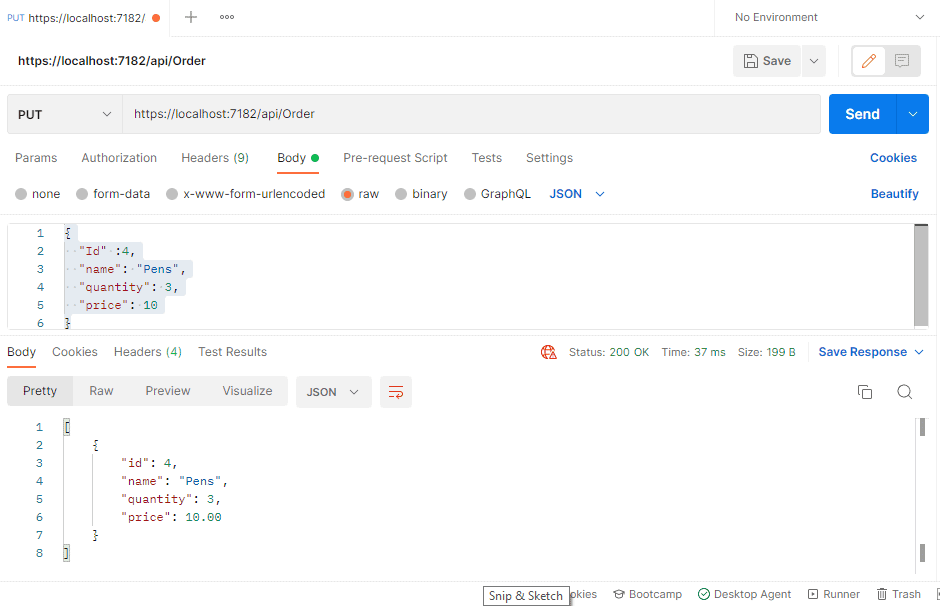
Testing HTTP Put method
The put method will update an existing entry by taking its ID. To test this method, choose PUT from the drop-down box, and enter the URL.
Select Body->raw->JSON again and paste the following script into the Postman window:
{
  "Id":1,
  "name": "Pens",
  "quantity": 3,
  "price": 10
}
This will update the entry from ‘Pencils’ to ‘Pens.’ Look for the ‘200 OK’ response to check if the request is successful.
Testing HTTP Delete method
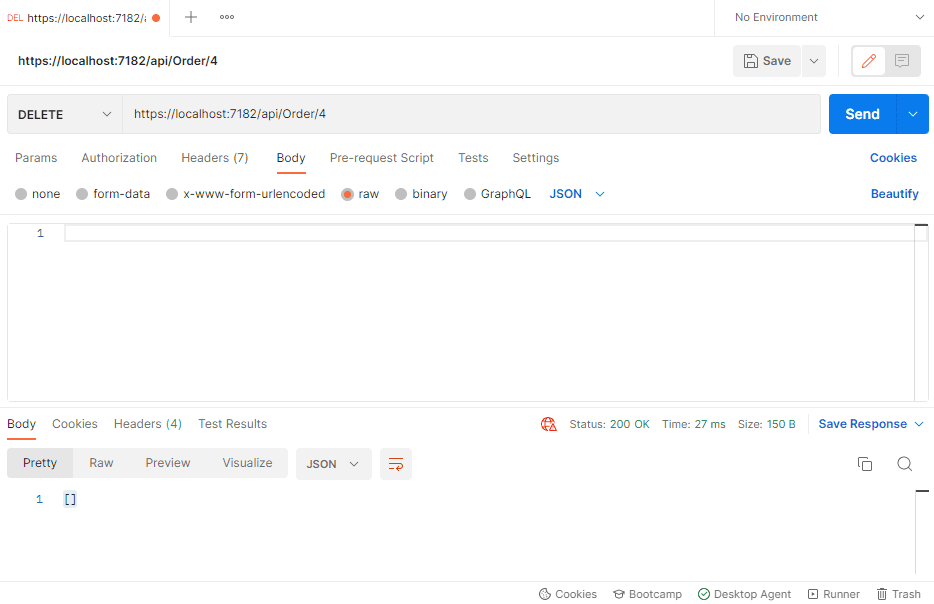
This method will test whether an entry is getting deleted from your database table. For this method, Choose DELETE from the drop-down menu, and place the URL in the box next to it.
Place the ID of the entry you want to delete next to the URL, for instance, https://localhost:7182/api/Order/1.
Note: The entry you are deleting or updating must already exist in the database
Hit the Send button and look for the ‘200 OK’ response to see if the API endpoint is working correctly.
If you had only one entry in the database before, it would be empty again.
Conclusion
Dapper is a popular open-source .NET micro-ORM that provides a fast and scalable interface for ADO.NET data sources. While it lacks some of the more prominent features of full ORMs, its object mapping turns CRUD operations into simple method calls.