If you are a developer, you understand how important it is to create code that you can create, maintain and update without struggle. However, this is possible only if you are creating loosely coupled modules.
With dependent classes, changes in one class will automatically require changes in the other one. And before you know it, you are spending nights trying to make everything work again.
Fortunately, you can easily avoid creating such modules or classes by using the Dependency Inversion Principle (DIP).
The dependency inversion principle states that your high-level modules should not depend on your low-level modules. To do this, you introduce an abstract interface in between. Resultantly, your code decouples and allows extendibility and higher readability.
If this is all going over your head, don’t worry. This article will teach you all about the dependency inversion principle, how to implement it in C# using dependency injection, and some real-life examples.
Understanding the Dependency Inversion Principle
The dependency inversion Principle or DIP is one of the five SOLID principles introduced by Robert C. Martin to increase the code’s usability and maintainability. These are:
- Single Responsibility Principle (SRP)
- Open Closed Principle (OCP)
- Liskov Substitution Principle (LSP)
- Interface Segregation Principle (ISP)
- Dependency Inversion Principle (DIP)
The fifth SOLID principle is the Dependency Inversion Principle. Its premise is that “high-level modules should not depend upon the low-level modules. Instead, they should depend upon abstractions.” It further clarifies that the abstractions should depend on the details and not the other way around.
In practice, when a class knows the implementation details and design of another class, making changes in one class increases the risk of breaking the encapsulation of another class. Therefore, modules should be as loosely coupled as possible. And that is how dependency inversion helps us out.
Dependency Injection and Inversion of Control
Inversion of Control (IOC) and Dependency Injection (DI) are two related concepts, often confused as the same thing.
Inversion of Control refers to the design principle, which is said to invert the control flow of the application in order to reduce the dependencies. Consider a class, say ‘A,’ which requires data from a source class, say ‘B.’ Now class A can directly make a connection with class B. In this way, class A provides the connection details and selects the source class to obtain information.
Now, suppose you pass these connection details through a constructor in class A. In this way, the class B or source class dependency gets decoupled because class A can connect with any class the caller will specify. Resultantly, the control gets transferred to the caller class from Class A.
Dependency Injection, on the other hand, is a technique of injecting dependencies through different methods to achieve inversion of control. More on that later!
Difference between low-level and high-level modules
Since Dependency Inversion talks in terms of high-level and low-level modules, it is crucial to understand the difference between them.
Low-level modules focus on specifics and individual details of smaller parts of the application. They have the implementation logic, therefore, high-level modules incorporate them inside themselves.
High-level modules, on the other hand, are more of an abstraction, having complex logic that works by incorporating various low-level modules.
DIP aims to decouple these modules by introducing an interface or abstractions between them.
How to implement the Dependency Inversion Principle in C#

As already discussed, dependency injection implements DIP. We can inject dependencies using constructors, property injection, or methods. The object being utilized may be different, but the goal is the same: to uncouple modules so they can be modified, expanded, and maintained easily.
To implement DIP in C#:
- Identify the high-level and low-level modules in your code.
- Create an interface that carries an abstract definition of the functionality the high-level module requires from the low-level module.
- The low-level module should carry out the implementation of the interface.
- Modify the high-level module so that it depends on the interface instead of the concrete implementation in the low-level module.
- Create the instance of the low-level module and inject it into the high-level module.
In this way, you can implement the dependency inversion principle to make your modules independent of one another.
There are many cases where DIP comes in handy, for instance, using plugins in applications is possible because the application depends on a general interface instead of a specific implementation. This allows it to add/remove multiple plugins without changing its base code.
Similarly, the application that interacts with the hardware has a low-level hardware layer. By introducing an interface, the application can interact with multiple hardware devices without any change in the high-level modules. The implementation does not matter to the upper layer as long as the interface remains the same. So we can switch our hardware easily.
Benefits of dependency inversion in C#
Dependency inversion is extremely important when it comes to writing maintainable and testable codes. Let’s look at how it benefits us.
#1 Increased code readability and maintainability
With dependency inversion, making the code modular is easier since there will be less coupling of modules with each other. This decreases the interdependency and makes it easier to understand the working of individual modules as well as to maintain them.
#2 Better code testability and easier unit testing
Dependency inversion allows you to replace dependencies with mock objects. This is possible because the high-level modules aren’t dependent on the lower-level ones but on abstractions. This makes replacing the lower-leveled modules to test the high-leveled ones in isolation easier.
#3 Enhanced code flexibility and scalability
You can easily scale your code by extending the module whose functionality you want to increase instead of editing the entire code. With dependency inversion, you have modules dependent on abstractions, so changing the implementation of one to adapt to any needed alteration is simple.
#4 Improved code structure and organization
Since the code and modules are decoupled and have individuality preserved with abstraction, you can clearly define the tasks and interfaces for each module. This results in a better overall code structure which is well-organized, with each module having its own task to perform.
#5 Better code reusability
This is one of the most important benefits of dependency inversion. You can make your high-level modules more dependent on the abstraction in a way that multiple modules can have the same abstraction. This will hide the information you don’t want other users to see from the low-level modules while having the advantage of reusability by avoiding code duplication for keeping the back-end of high-level modules safe!
How to implement dependency inversion in C#?
Dependency Injection is a technique used to implement dependency inversion. To understand dependency injection, you first need to understand what dependencies really are.
To explain simply, if class A uses the functionality of any other class, say B, then class B is a dependency of class A. To inject means to pass the dependency from an external source instead of creating it in the high-level class.
Therefore, dependency injection refers to the act of passing one object to another one that requires it instead of letting the former object create the object-needed itself.
It’s an extremely useful design pattern in object-oriented programming as it allows you to unit-test your application and simplify changes and modifications. For instance, you have an online store that uses Payoneer for payments. For whatever reason, you are unhappy with the current payment processing service and want to shift to Paypal.
How would you do it?
You will need to rewrite the store logic with a Paypal dependency now, which would be an ordeal in itself. But if you had used DI, you’d be able to swap Paypal with Payoneer without making any changes to your store. So, whatever payment processor you may use, your store logic would only see the interface, which would remain the same.
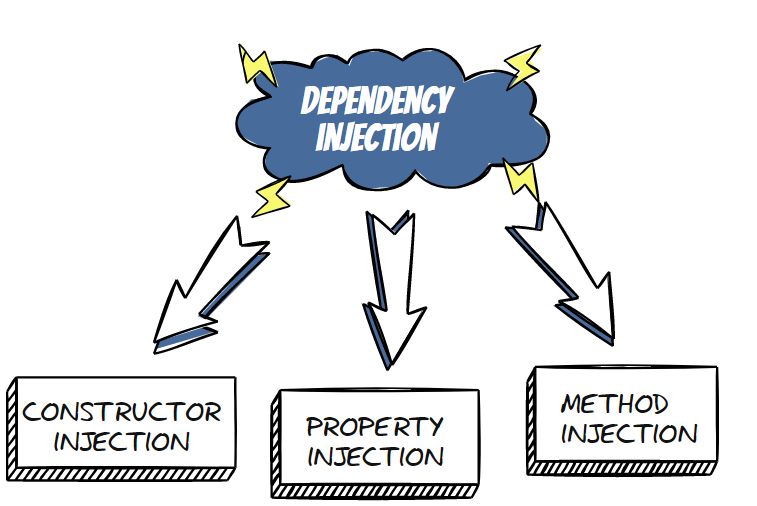
There are three common ways with which you can inject dependencies into your application, namely:
- Constructor Injection
- Property Injection
- Method Injection
Let’s look at them in detail.
1. Constructor Injection
One of the techniques to inject dependencies involves using parameterized constructors. Instead of instantiating the dependency object inside the high-level class, users can pass the dependency as a constructor argument. In this way, the class will only require the dependency object as an argument. Resultantly, users can pass dummy dependencies for unit testing.
Take, for example, a program that displays information about all the people who have previously owned a specific car. It would look something like this:
public class CarOwner
{
    public int ID { get; set; }
    public string Name { get; set; }
    public string Profession { get; set; }
    public string DurationOwned { get; set; }
}
public class CarOwnerList
{
    public List<CarOwner> SelectAllOwners()
    {
        List<CarOwner> ListOwners = new List<CarOwner>();

        ListOwners.Add(new CarOwner() { ID = 1, Name = "Jacob", Profession = "Lawyer", DurationOwned = "3 years" });
        ListOwners.Add(new CarOwner() { ID = 2, Name = "Joshua", Profession = "Football Player", DurationOwned = "2 years" });
        ListOwners.Add(new CarOwner() { ID = 3, Name = "Nemo", Profession = "Professional Swimmer", DurationOwned = "8 years" });
        return ListOwners;
    }
}

public class CarOwnerBL
{
    public CarOwnerList carownerlist;
    public List<CarOwner> GetAllOwners()
    {
        carownerlist = new CarOwnerList();
        return carownerlist.SelectAllOwners();
    }
}
Here, the “CarOwnerBL” depends upon the data in the “CarOwnerList,” and since the latter is created inside the CarOwnerBL, they are tightly coupled with one another. In other words, every time there’s a change in the CarOwnerList, the CarOwnerBL will also need to change.
Now let’s decouple these classes using constructor injection. First, create an interface for CarOwnerList, and then create its concrete implementation.
First, create an interface for CarOwnerList, and then create its concrete implementation.
public interface ICarOwnerList
{
    List<CarOwner> SelectAllOwners()
    {
        return new List<CarOwner>();
    }

}

public class CarOwnerList : ICarOwnerList
{
    public List<CarOwner> SelectAllOwners()
    {
        List<CarOwner> ListOwners = new List<CarOwner>();

        ListOwners.Add(new CarOwner() { ID = 1, Name = "Jacob", Profession = "Lawyer", DurationOwned = "3 years" });
        ListOwners.Add(new CarOwner() { ID = 2, Name = "Joshua", Profession = "Football Player", DurationOwned = "2 years" });
        ListOwners.Add(new CarOwner() { ID = 3, Name = "Nemo", Profession = "Professional Swimmer", DurationOwned = "8 years" });
        return ListOwners;
    }
}
Now modify the CarOwnerBL so that it takes the dependency as a constructor argument.
public class CarOwnerBL
{
    public ICarOwnerList carownerlist;
    public CarOwnerBL(ICarOwnerList carownerlist)
    {
        this.carownerlist = carownerlist;
    }

    public List<CarOwner> GetAllOwners()
    {
        return carownerlist.SelectAllOwners();
    }
}
Note how the CarOwnerBL now sees the interface and not the implementation of CarOwnerList. Running the code with the client file will give the following result:
ID = 1, Name = Jacob, Department = Lawyer
ID = 2, Name = Joshua, Department = Football Player
ID = 3, Name = Nemo, Department = Professional Swimmer
The one thing in this approach that you want to avoid is to have too many constructor parameters.
2. Property Injection
Another method to loosen up the coupling of your modules is the property injection technique.
In this type of dependency injection, a public property of the client class takes the dependency instead of the constructor. Therefore, the high-level class can have a default constructor while having the necessary objects from the low-level classes.
Let’s consider our previous program that displayed a list of all the previous owners of a car. We will keep the CarOwner object, the interface, and the database layer CarOwnerList the same. In the CarOwnerBL (the business layer), replace the constructor dependency with a get; set property as shown below:
public class CarOwnerBL
{
    private ICarOwnerList carownerlist;
    public ICarOwnerList CarOwnerObject
    {
        set
        {
            carownerlist = value;
        }
        get
        {
            if (CarOwnerObject == null)
            {
                throw new Exception("NO Owner Yet");
            }
            else
            {
                return carownerlist;
            }
        }
    }

    public List<CarOwner> GetAllOwners()
    {
        return carownerlist.SelectAllOwners();
    }
}
Here, the ICarOwnerList passes the dependency into the calling class. The set property reads its value, whereas the get property returns it. It’s necessary to handle the case where there is no previous owner yet, or else a mishandled exception error will occur.
Due to the get; set property, this method is also known as setter injection. Update the Main method to see your new code in action:
class Program
{
    static void Main(string[] args)
    {
        CarOwnerBL carownerBL = new CarOwnerBL();
        carownerBL.CarOwnerObject = new CarOwnerList();

        List<CarOwner> ListOwner = carownerBL.GetAllOwners();
        foreach (CarOwner emp in ListOwner)
        {
            Console.WriteLine($"ID = {emp.ID}, Name = {emp.Name}, Department = {emp.Profession}");
        }
        Console.ReadKey();
    }
}
3. Method Injection
The third method of passing the required dependency to another class is by using a method. So, instead of using a constructor argument or a public property, we use a method argument to insert the object into our class.
Consider the example of the Car Owners List again. To inject our dependency object, i.e., CarOwnerList, we will need to modify the CarOwnerBL as follows:
public class CarOwnerBL
{
    public ICarOwnerList carownerlist;

    public List<CarOwner> GetAllOwners(ICarOwnerList _carownerlist)
    {
        carownerlist = _carownerlist;
        return carownerlist.SelectAllOwners();
    }
}
This class now carries a method GetAllOwners, which has an argument of the CarOwnerList interface. In this way, instead of creating the object inside the business layer of our application, we pass the object it requires through a detached method.
Modify the Main method so that now it carries a CarOwnerList() as an argument of the method, GetAllOwners().
class Program
{
    static void Main(string[] args)
    {
        CarOwnerBL carownerBL = new CarOwnerBL();


        List<CarOwner> ListOwner = carownerBL.GetAllOwners(new CarOwnerList());
        foreach (CarOwner emp in ListOwner)
        {
            Console.WriteLine($"ID = {emp.ID}, Name = {emp.Name}, Department = {emp.Profession}");
        }
        Console.ReadKey();
    }
}
Choosing the right type of dependency injection
This article has discussed three different techniques to loosely couple your applications. But which one should you go for?
The most commonly used type of dependency injection is the constructor injection. It ensures that all the objects are already initialized. Therefore, we don’t have to handle exceptions using this technique. Furthermore, the constructor dependencies are easily visible in the code.
However, constructor injection makes supplying a dependency a must. The constructor call will always require some argument to be passed.
But there are many cases (say, adding an optional feature to your application) where the dependency is optional. Here, the setter method comes in handy. Moreover, if you want to set the dependencies sometime during the object’s lifecycle or runtime, this technique is the one that will make this simple.
At times, the dependency is only required by a specific method. In such cases, method injection works the best. Also, the method injection is your answer if there are multiple dependency implementations or if we want to change them during run-time.
Dependency injection frameworks in C#
Since dependency injection is such an important tool, various frameworks exist to implement this concept. They make it easier to configure and inject dependencies into your application.
Some of these frameworks are:
Pros and cons of dependency injection frameworks
Although an excellent tool, dependency injection frameworks are not entirely advantageous. So, here are the pros and cons so you can decide whether you want to go with them.
Pros
- Dependency injection frameworks make it easier to unit test your application.
- They reduced the complexity of injection dependencies overall.
- These frameworks provide a standardized approach for injection dependencies.
- You can find proper documentation and technical support with these frameworks to help you implement Inversion of Control (IOC) correctly.
Cons
- Frameworks are third-party codes, and they are difficult to maintain as they are not yours.
- Sometimes, multiple frameworks don’t mesh well together, which will lead you to an error-finding spree.
- You may have to spend time learning new concepts or techniques, which is difficult if you have deadlines coming up.
- They may add unnecessary computing time, affecting the performance of the application.
Tips and best practices for implementing dependency inversion in C#
Here are a few things to keep in mind if you want to implement dependency inversion properly:
- Use interfaces: Dependency inversion requires interfaces your high-level classes will depend on and your low-level classes should implement. So, don’t forget to create those.
- Don’t inject too many dependencies: If a class has too many dependencies, the class is most likely violating the Single Responsibility Principle. In such cases, shift some dependencies to other classes.
- Don’t forget other SOLID principles: While writing with DIP, taking care of other principles like the Single Responsibility Principle, the Open-Closed Principle, etc., is also important. Make sure you are following other SOLID principles as well.
- Don’t forget YAGNI: You don’t need dependency inversion for really small applications or modules that will never need flexibility. In such cases, passing the concrete implementation keeps the code smaller and easier to read.
Conclusion
Inversion of control refers to the process of allowing the framework to call implementations. It makes extensions, modifications, and testing easier. To implement IOC, dependency injection is used.
Users can use constructor injection, property injection (also known as setter injection), or method injection to introduce dependencies into their high-level classes and make them loosely coupled.
Various frameworks for DI are also available, but users should use DI containers with caution as they can sometimes cause more harm to their code.