If you are a C# developer, you must be using constructors as long as you can remember.
A constructor is the first thing your class invokes when instantiated, and you will generally use it to initialize the field values of your class.
If you don’t create a constructor, your C# compiler will as soon as you instantiate your class.
At times, you will create a constructor with multiple parameters passed to it. That’s where the trouble begins.
A constructor with non-zero parameters is known as a ‘Parameterized Constructor’. While it lets you initialize different classes with different values, going overboard with the number of parameters can lead to serious code smells (hidden errors).
But what should you do when dependency injection through constructor parameters is inevitable?
That’s where this article comes in.
We will discuss identifying too many constructor parameters and dealing with them to make your code readable, flexible, and easier to change. So, let’s begin, shall we?
How many parameters are too many in a constructor?
Dependency injection can be a wonderful thing. You just need to pass the dependency through the constructor and you are done.
However, as with other code areas, things can quickly get out of hand. And you end up with 12 constructor arguments.
As a rule of thumb, if you are passing more than five parameters to your constructors, the code needs revisions.
Constructors with that many arguments are most likely violating the Single Responsibility Principle. According to this principle, every class should have one and only one function to perform. Some people might confuse it with having a single property or method, but that’s not the case.
A class with a single responsibility can have multiple properties and methods as long as it handles only one task.
Consider a class named Employee that saves an employee’s personal record and calculates his bonus. It would look something like this:
class Employee
{
    string name;
    int id;
    string address;
    string city;
    string state;
    string department;
    int salesmade;
    int bonuspercentage;

    public Employee(string name, int id, string address, string city, string state, string department, int salesmade, int bonuspercentage)
    {
        this.name = name;
        this.id = id;
        this.address = address;
        this.city = city;
        this.state = state;
        this.department = department;
        this.salesmade = salesmade;
        this.bonuspercentage = bonuspercentage;
    }
}
If you look at its constructors, it has eight arguments and clearly not following the Single Responsibility Principle, which is only the first step toward a coding disaster.
Let’s see how we can avoid creating such unpleasant and hard-to-read code.
How to reduce the number of Constructor Parameters?
A constructor with many parameters is a very common code smell. Long parameter lists are hard to understand, so a good practice would be to try and remove unnecessary items from the list.
That’s why if there’s a way to refactor the constructor to have fewer parameters, you should do that.
To reduce the number of constructor parameters, you can use one of the following four approaches:
- Split the class into multiple classes
- Use the Builder design pattern
- Introduce Parameter Object
- Use the Facade design pattern
Let’s look at these techniques in detail. Also, if you need help reducing the number of parameters in other methods, check out this article.
1) Split the class into multiple classes
A class with too many dependencies as constructor parameters tends to violate the Single Responsibility Principle. An easy solution to this problem is moving some of the logic to a new class, splitting the original class in the process.
You can do this using the Extract Class, Extract Method and Move Method refactoring techniques. Begin by understanding how to give each class a single and distinguishable responsibility. Then:
- Create a new class and name it according to its new responsibility.
- Connect the two classes by passing the instance of the new class into the original class.
- Use the Move method to move the relevant methods and fields into the new one.
- Rename the old class (if required) according to its new functionality.
This method will reduce the number of constructor parameters and make your classes more independent and clean.
Let’s understand this with our original example of the Employee class:
class Employee
{
    string name;
    int id;
    string address;
    string city;
    string state;
    string department;
    int salesmade;
    int bonuspercentage;

    public Employee(string name, int id, string address, string city, string state, string department, int salesmade, int bonuspercentage)
    {
        //personal record
        this.name = name;
        this.id = id;
        this.address = address;
        this.city = city;
        this.state = state;

        //bonus calculation
        this.department = department;
        this.salesmade = salesmade;
        this.bonuspercentage = bonuspercentage;
    }

    internal string EmployeeInformation()
    {
        return $"{name}, {id}, {address} {city}, {state}";
    }

    //other methods here
}
Here the class has two different responsibilities along with a massive parameterized constructor. We can split the class by maintaining the personal record in a separate class.
First, create a new class, PersonalRecord, and instantiate it in the Employee class. Now move all the relevant properties to this new class, and remove them from the original class along with the constructor call that initializes those properties.
Your changed Employee class would look something like this:
class Employee
{
    string department;
    int salesmade;
    int bonuspercentage;
    PersonalRecord record;

    public Employee(PersonalRecord record, string department, int salesmade, int bonuspercentage)
    {
        this.record = record;
        //bonus calculation
        this.department = department;
        this.salesmade = salesmade;
        this.bonuspercentage = bonuspercentage;
    }

    public string EmployeeInformation()
    {
        return $"{record.name}, {record.id}, {record.address} {record.city}, {record.state}";
    }

    //other methods here
}
To implement the Move Method, create a method with the name EmployeeInformation and copy the logic from the original class to the target class.
class PersonalRecord
{
    internal string name{ get; set; }
    internal int id { get; set; }
    internal string address { get; set; }
    internal string city { get; set; }
    internal string state { get; set; }


    internal string EmployeeInformation()
    {
        return $"{name}, {id}, {address} {city}, {state}";
    }

}
Now call this method in your original class, as shown in the snippet:
public string EmployeeInformation()
{
    return record.EmployeeInformation();
}
In this way, you have not only thwarted the unnatural number of constructor parameters, but your code is more modularized and flexible to change!
2) Use Builder design pattern
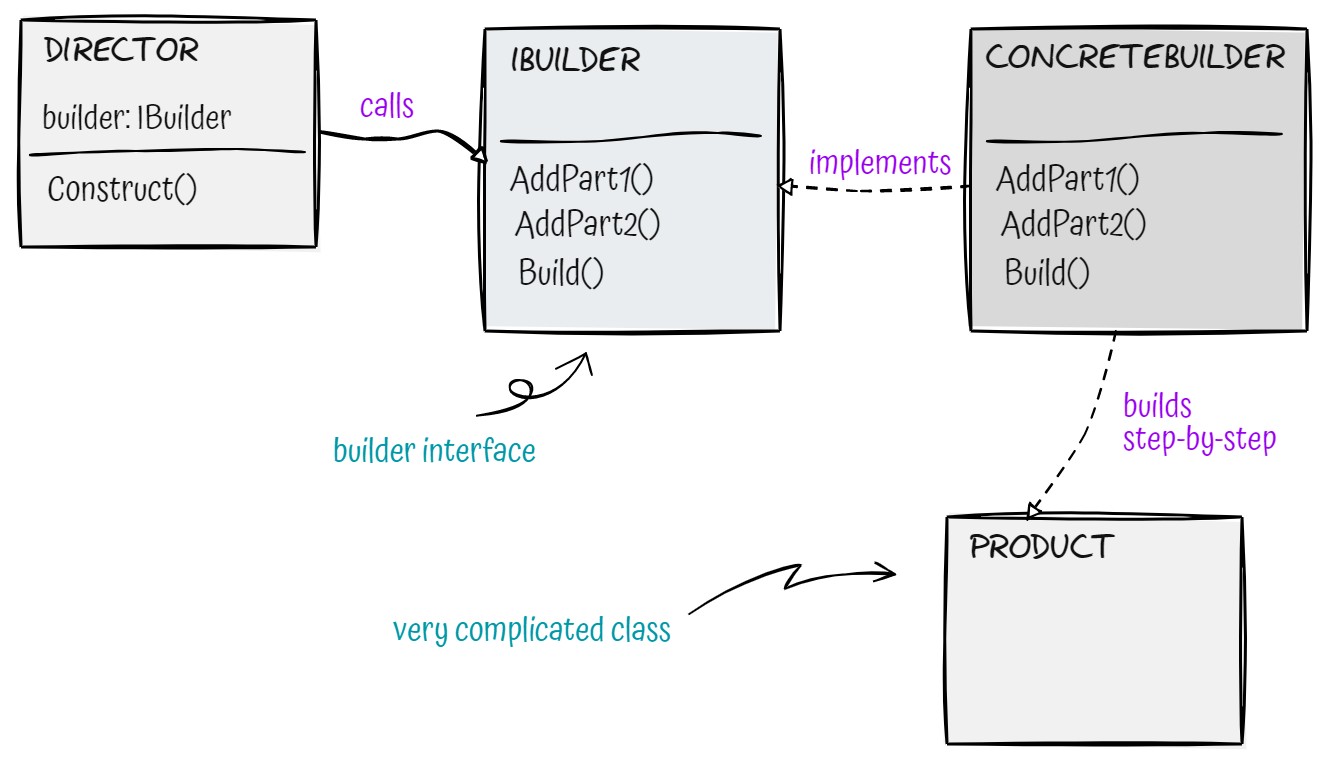
The Builder pattern is a creational design pattern used to separate the construction and representation of the object. Instead of a constructor, it uses a builder to create and modify a product.
At times, you might pass a list of arguments in the constructor, and not all are required in every instance of the object. One way to do that is by initializing these parameters with a default value. However, it makes the code look messy and harder to debug.
This is where the Builder design pattern comes in.
With this pattern, users can create a Builder class inside the main code and fill it with the implementation logic. The builder incrementally builds your product, creating a complex object in the process.
Let’s look at how you can clean your messy-looking parameterized constructors with the Builder pattern.
Suppose we are filling our employee record:
class Employee
{
    public string Name { get; set; }
    public int Id { get; set; }
    public string Address { get; set; }
    public string City { get; set; }
    public string State { get; set; }
    public string Department { get; set; }
}
Now, let’s use the Builder pattern to initialize your object.
In the example, you begin by creating the abstract builder. Next, you add the implementation logic in the Builder object.
The Builder pattern implementation consists of two another classes: the Product and the Director. The Product class contains the representation of the complex object being built inside the Builder class step-by-step, whereas the Director class decides which products should be built.
In this example, the Product is the Employee class, while the Director class is the main code that decides to create a new instance of the Employee.
Now your code is updatable and future-proof. Furthermore, you can build any part of the employee you like while omitting the other fields.
interface IEmployeeBuilder
{
    void AddName(string name);
    void AddId(int id);
    void AddAddress(string address);
    void AddCity(string city);
    void AddState(string state);
    void AddDepartment(string department);

    Employee Build();
}

class ConcreteEmployeeBuilder : IEmployeeBuilder
{
    private Employee employee;

    public ConcreteEmployeeBuilder()
    {
        employee = new Employee();
    }

    public void AddName(string name)
    {
        employee.Name = name;
    }

    public void AddId(int id)
    {
        employee.Id = id;
    }

    public void AddAddress(string address)
    {
        employee.Address = address;
    }

    public void AddState(string state)
    {
        employee.State = state;
    }
    public void AddCity(string city)
    {
        employee.City = city;
    }
    public void AddDepartment(string department)
    {
        employee.Department = department;
    }
    public Employee Build()
    {
        return employee;
    }
}

public class EmployeeDirector
{
    public EmployeeDirector()
    {
        var concreteEmployeeBuilder = new ConcreteEmployeeBuilder();

        concreteEmployeeBuilder.AddName("Nemo");
        concreteEmployeeBuilder.AddId(1);
        concreteEmployeeBuilder.AddAddress("P Sherman 42 Wallaby Way");
        concreteEmployeeBuilder.AddCity("Sydney");
        concreteEmployeeBuilder.AddState("None");
        concreteEmployeeBuilder.AddDepartment("Fishing");

        var _product = concreteEmployeeBuilder.Build();
    }
}
3) Introduce Parameter Object
If a constructor has a long parameter list, users can group related parameters and convert them into a class with a meaningful name. This object then goes into the class as an argument, making it easier for future developers to navigate and make changes to it.
Moreover, in many cases, the optional parameter needs a new value or an update in the previous value. Doing it in all the instances is tedious and requires plenty of effort.
A parameter object overcomes this problem by allowing users to make changes in one place that automatically gets detected everywhere else.
For instance, to create a Rectangle, you need the coordinates and the size. These parameters are passed as follows:
class Rectangle
{
    public Rectangle(int x_cord,
                     int y_cord,
                     int height,
                     int width)
    {
        // some logic
    }
}
However, a good practice is to keep the arguments to two or three. This is how we can do it using the parameter object:
public class Point
{
    public int x_cord { get; set; }
    public int y_cord { get; set; }
}
public class Size
{
    public int height { get; set; }
    public int width { get; set; }
}
class Rectangle
{
    public Rectangle(Point _point, Size _size)
    {
        // some logic
    }
}
Here two classes, Point and Size, have reduced the number of parameters from four to two. This way, the parameter object provides a simple yet elegant way to deal with too many constructor parameters.
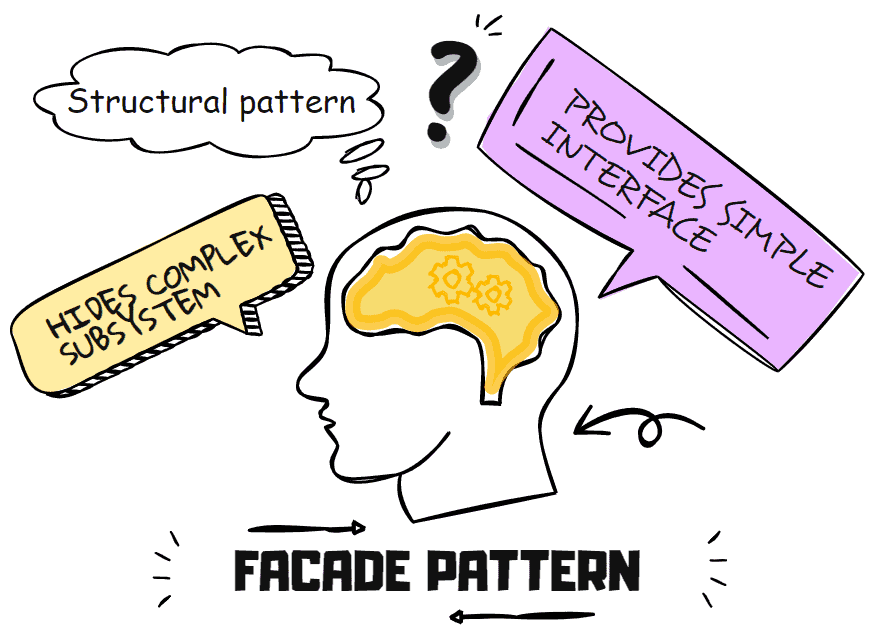
4) Use the Facade design pattern
Another way to deal with many constructor arguments is by wrapping some of them in a Facade Design Pattern.
This pattern provides a simplified top-level interface of all the complex subsystems beneath. The client only needs to know what happens in the Facade while the dependencies and interaction between the subsystems remain hidden.
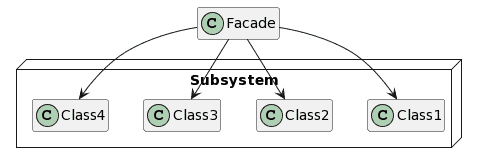
However, if a programmer needs to customize the code, they can still look into the subsystems and make the changes. In this way, a Facade Design Pattern simplifies the code while still providing internal implementation access to the people who need it.
Take the example of our original Employee class, which first updated the Employee Record and then calculated their bonus.
In this class, you can clean up the code by handing all the complexities to the two subsystems: Employee Record and Employee Bonus, whereas the client only deals with the upper-level interface in the Facade.
public class EmployeeFacade
{
    EmployeeRecord _employeerecord;
    EmployeeBonus _employeebonus;

    public EmployeeFacade(EmployeeRecord employeerecord, EmployeeBonus employeebonus)
    {
        _employeerecord = employeerecord;
        _employeebonus = employeebonus;
    }

    public void EmployeeRecord()
    {
        _employeerecord.AddName();
        _employeerecord.AddId();
        _employeerecord.AddAddress();
    }

    public void EmployeeBonus()
    {
        _employeebonus.AddSalesMade(10000);
        _employeebonus.AddBonusPercentage(5);
        _employeebonus.CalculateBonus();
    }
}

public class EmployeeRecord
{
    public void AddName()
    {
        Console.WriteLine("Updating Name\n");
    }

    public void AddId()
    {
        Console.WriteLine("Updating Id\n");
    }

    public void AddAddress()
    {
        Console.WriteLine("Updating Address\n");
    }

    public void AddState()
    {
        Console.WriteLine("Updating State\n");
    }
    public void AddCity()
    {
        Console.WriteLine("Updating City\n");
    }
    public void AddDepartment()
    {
        Console.WriteLine("Updating Department\n");
    }
}

public class EmployeeBonus
{
    public int salesmade;
    public int bonuspercentage;
    public int bonus;
    public void AddSalesMade(int salesmade)
    {
        this.salesmade = salesmade;
    }

    public void AddBonusPercentage(int bonuspercentage)
    {
        this.bonuspercentage = bonuspercentage;
    }

    public void CalculateBonus()
    {
        bonus = salesmade * 1 / 100 * bonuspercentage;
        Console.WriteLine("The Bonus is:");
        Console.Write(bonus);
    }
}

class Client
{
    public static void ClientCode(EmployeeFacade facade)
    {
        facade.EmployeeRecord();
        facade.EmployeeBonus();
    }
}
The usage code:
class Program
{
    static void Main(string[] args)
    {
        EmployeeRecord _employeerecord = new EmployeeRecord();
        EmployeeBonus _employeebonus = new EmployeeBonus();
        EmployeeFacade facade = new EmployeeFacade(_employeerecord, _employeebonus);
        Client.ClientCode(facade);
    }
}
Output:
Updating Name

Updating Id

Updating Address

The Bonus is:
500
Now the long list of parameters seen before is hidden in a professional-looking and updateable code.
Conclusion
Dealing with too many constructor parameters often leads to underlying dependency problems and a rigid code structure. However, sometimes, the logic cannot be tailored to create a smaller parameter list.
In such cases, these are the things you can do:
- Split the class into multiple classes, each doing a specific, focused task.
- Use the builder pattern to hide the implementation logic in the builder.
- Make an object of all the parameter lists and pass it into your class.
- Use the Facade Pattern to expose only the simplified interface to your client.